Watch the video below to learn how to set up a Party in your Partner Portal.
The Pop Up (Party) Manager allows Partners to view all their parties, status, and details. You can create new parties, edit existing parties, and add orders to parties.
To access from the Partner Portal go to Pop-Up (Party) > Pop-Up (Party) Manager.

To create a new Pop-Up link, click New Party in the top right-hand corner. Creating or editing a party allows you to enter all the details regarding the party directly into the Partner Portal. You will enter who is hosting, party details, and the party address.
Selecting a Host
Who is Hosting? – Dropdown with 3 options: I Am Hosting, My Customer, and New Customer.
- I Am Hosting: You, the Partner creating the party in your portal is the host.
- My Customer: The Partner is creating a party for one of their customers to host. When this option is chosen a second dropdown box will appear to search for the customer. Search by entering the first 3 characters of the customer’s name or ID.
- New Customer: Choosing this option will bring the Partner straight to the create new person page to add a new customer before hosting. NOTE: NEVER enter your personal email address on a customer or hostess’ order or account. Your email address is unique to YOU, and by doing so you will change your own personal account details to the details of the account you are adding your email address to.

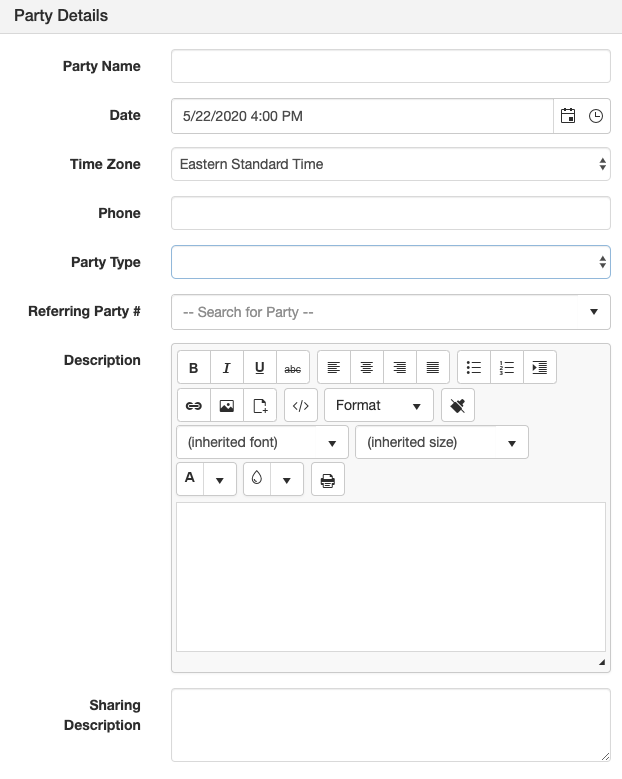
Party Details Creation
Party Name – Choose a name for the new party.
Date – Choose the date and time for when the party will occur. Icons to the right can be used to conveniently select the date and time.
Time Zone – Choose the time zone the party will be hosted in.
Phone – Field to provide a contact phone number.
Party Type – Choose Home Party, Online Party or Vendor Event
Referring Party # – Enter the ID of a referral party ID here (optional).
Description – Enter detailed information relevant to the party being created.
Sharing Description – A brief description that will appear for the party when the party event link is shared on a social site (i.e. Facebook).
Event Image – Add an event image to display with the shared description by clicking ‘Select files.’ This image will be featured by the event on the consultant’s upcoming events page.
Similar to shared images, shared link images have an optimal size of 1,200 x 627 pixels. Keep these guidelines close by when uploading shared link images:
Rectangular photo has a minimum upload size of 470 x 246 in feed.
Display Event On Customer Website – If this box is checked this event will be shown publicly on the Partner’s replicated website.
Display Event Address – Check this box to show the event address entered above where this event is shown.
Display Event Phone Number – Check this box to show the phone number entered above where this event is shown.
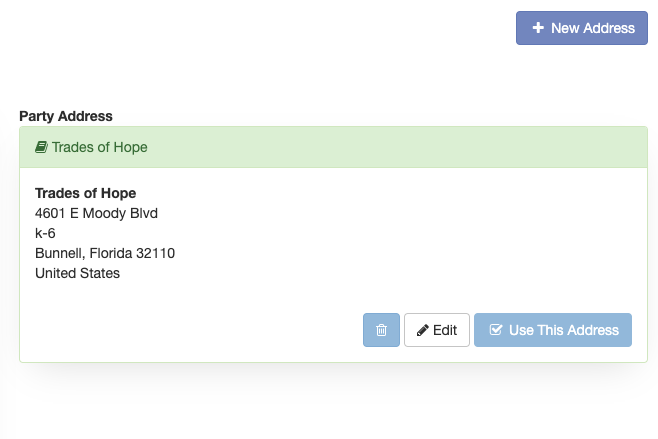
 Party Address
The party host address will automatically be listed as the default address on the host’s record. To choose a different address, click Use This Address from one of the addresses available in the address book for the host’s profile or click New Address to enter a new address for the party.
When all information is complete, click Save Party at the bottom-right of the screen. This will take the user to the Party Details page of the now existing party.