To search for the customer, navigate to Customer Center. You can use the Search Bar to search for a specific customer.
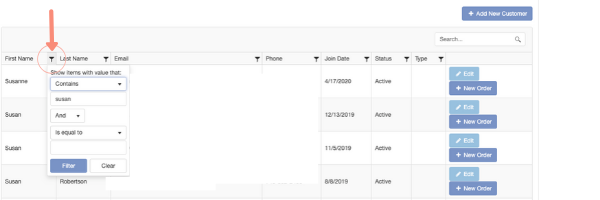
You can also filter your results by clicking the filter icon next to each search criteria, for example you can click the filter icon next to first name and search for any customer who’s name contains ‘Susan’
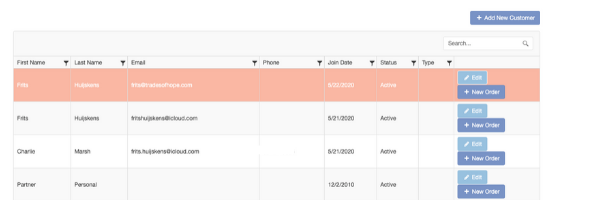
 If the customer hasn’t been created yet, click Add New in the right-hand corner of your page and enter your customer details.
Search Results
This displays the Customers that match the criteria. Click the customer to view and update.
View Customer
This displays the customer’s details on the bottom of the page. Use the buttons along the top and the tabs mid-section to view and update the customer’s information:
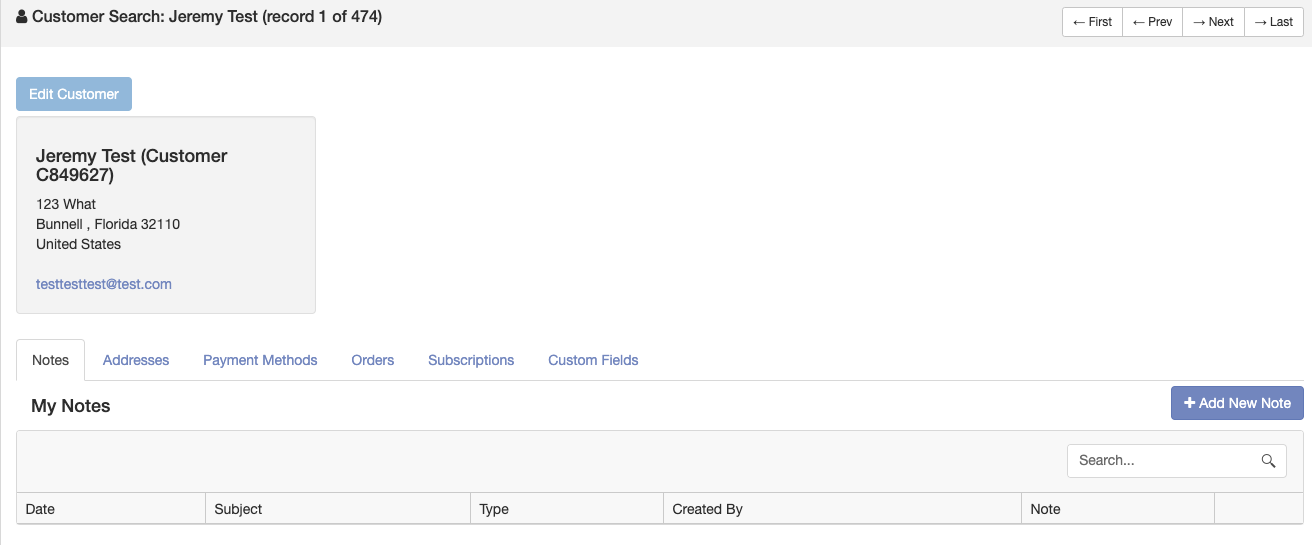
Click the different buttons above the customer details area to be taken to another page or pop open a window to perform the labeled actions:
Edit Customer: Press this button to update information on a customer similar to the Create New Customer Process.
Notes lists the notes that have been saved to the customer. Click Add New Note to add a new note about this customer.
Addresses lists all the customer’s addresses and shows the Default and Mailing address. Press Edit or Add New Address to make any updates.
Payment Methods lists the customer’s primary payment method and any other options that have been entered. Press Edit or Add New Credit Card (Payment Method) to make any updates.
Orders lists the customer’s orders. To view order details, click the arrow to the right of the Order ID.

Subscriptions lists all the customer’s subscriptions. To update a subscription click Edit.
Custom Fields lists any custom information entered in for that customer.
The Add a Customer page is organized by sections.
First Name & Last Name: Enter the customer’s first, and last names.
Company Name: Enter the name of the customer’s company, if applicable.
Default Mailing Address

Country: The Country will automatically populate with United States.
Street Address: Enter the first and second, if appropriate, lines of the customer’s mailing address in ‘Street1’ and ‘Street 2.’ This is the address to which orders will be sent so it must be complete and accurate.
City: Enter the name of the city or town.
State/Province: Click the downward arrow to select the state or province. The options displayed in your menu are based on the country you selected above.
Postal Code: Enter the customer’s postal/zip code. The format for this box is based on the country you selected above.
Phone Number: Enter the phone number that should be used when resolving issues related to the mailing address when orders are shipped. You’ll enter the customer’s phone numbers and select the primary point of contact in another section below.
Special Instructions: Enter notes regarding shipments, if applicable. This information can be used when orders are prepared for shipping.
Contact Information
Email Address: Enter the customer’s primary email address. This is the email address that we will use to communicate with the customer. For example, when the customer clicks ‘Forgot Your Password’ on the login page, instructions are emailed to this address. Check any boxes the customer would like to opt-out of for receiving emails.
DO NOT under ANY CIRCUMSTANCES use YOUR email address for your customer. If you do not have an email address for your customer, you may leave this field BLANK.
Phone Numbers: Click the downward arrow to view the types of numbers (e.g. home, work, cellular, fax). The options in your menu are specific to your company’s requirements so they may be different than the examples shown below.
Click the type to select it, then enter the number in the following box.
Click Primary if this is the customer’s preferred point of contact.
Click + to add another number. This displays an additional line to enter a second phone number. You can enter all of the customer’s numbers following the instructions outlined above. To remove a phone number, click – for that number.
Once you have entered all information, click Save New Customer.
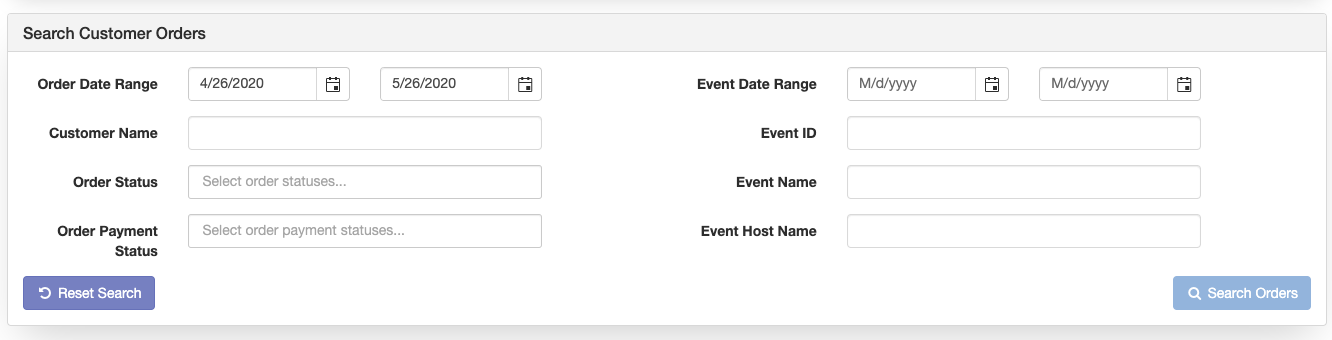
From My Customer Orders, you’ll be able to search for orders made by your customers using many different methods.
- Order Date Range
- Order Status
- Order Payment Status
- Event Date Range
- Event ID
- Event Name Event Host Name
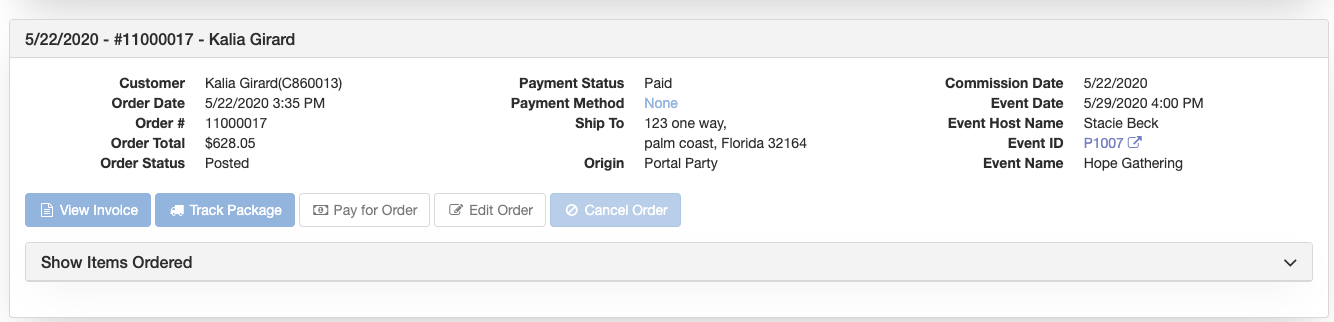
Once you find your customer’s order, you will be able to view the order details, show the items in the order, track the package, pay for, edit or cancel the order (if applicable).
In the example below, I searched by customer name and found 3 orders for my customer: Kalia Girard.